Recent Posts
Powerful Trash Pumps Impact Fast Water Removal for Wilton Homes
3/17/2025 (Permalink)
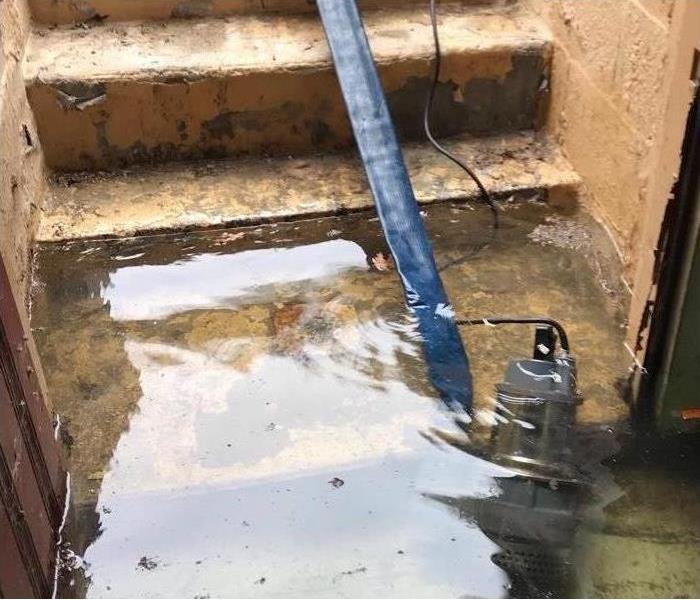 SERVPRO technicians expertly remove water to mitigate damage in Wilton area properties. "Like it never even happened."
SERVPRO® Relies on High-Volume Extractors to Save Properties
When water disasters occur, restorers like our SERVPRO team rely on countless tools and equipment. From air movers to manage structural drying to dehumidifiers to regulate indoor humidity, our inventory works in tandem to manage complex extraction, drying, and repair needs for homes and businesses, with equipment like trash pumps leading the process.
The Use of Trash Pumps in Mitigation Services
Gas-powered pumps are a formidable and versatile device intended exclusively for water removal in Wilton homes and businesses. Unlike the regular pumps that can only move water, including high-pressure units and wet vacuums, trash pumps specialize in contaminated water, water with solids and debris, and high-volume extraction needs. The secret to this is the impellers within the machine, drawing in water and debris via the intake line, sending it through the piping, and rapidly discharging it through connected hoses.
The models used by our SERVPRO team can remove thousands of gallons an hour. This high flow rate is vital when several feet of standing water is a concern and is the most efficient path to getting needed restoration and recovery work started promptly. Trash pumps are chosen because of their versatility and dependable results. They require no functional electricity to operate, making them ideal extraction solutions for flooded properties.
Effective Mitigation Starts with SERVPRO
At SERVPRO of Hollis, Peterborough, and Weare, we understand the urgency of water damage threats to your property. Mitigation is one of the biggest priorities of our mobilizing response team, reducing loss and protecting what matters most to families. We stock production vehicles with numerous extraction and water removal tools to provide a range of efficient discharge, including:
- Trash pumps
- Wet vacuums
- Squeegee wands
- Carpet wands
- Weighted extractors
When disasters strike your Wilton home, trust SERVPRO of Hollis, Peterborough, and Weare to help. We are ready 24/7 at (603) 256-9559.
How Books and Papers are Impacted by Fire Damage
3/13/2025 (Permalink)
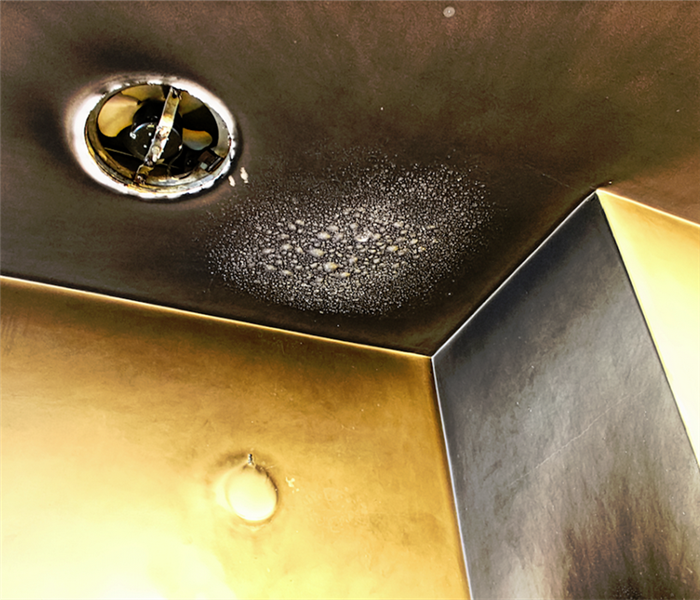 Fire damage can leave lasting effects in your home if not properly dealt with. Contact SERVPRO 24/7 for a remediation plan for you.
Restoring Fire-Affected Documents and Books for Peterborough Residents
Structural damage is usually the first concern when a fire occurs, but the loss of essential documents and beloved books can be just as devastating. In Peterborough, fire and smoke damage can leave paper materials fragile, stained, or illegible. Soot, smoke, and water from firefighting efforts often worsen the situation.
Our highly skilled restoration professionals at SERVPRO® are equipped with IICRC-compliant, specialized techniques and equipment. We are dedicated to recovering and preserving fire-damaged books and documents for Peterborough homeowners alongside structural materials, furnishings, and other critical and cherished items.
How Fire Damage Affects Documents and Books
Fire and smoke can cause significant harm to paper materials, often making restoration a challenge. Fire damage to documents and books can result in:
- Particles clinging to paper fibers and cause permanent discoloration.
- Excess moisture after firefighting damages paper and adhesives, leading to warping, ink bleeding, and mold growth.
- High temperatures can curl, char, or weaken paper until it is brittle.
- Paper and bookbinding materials absorb smoke odors.
SERVPRO's Approach to Fire-Damaged Document Restoration
SERVPRO of Hollis, Peterborough, and Weare provides comprehensive fire cleanup services, including advanced document recovery techniques, such as:
- If firefighting efforts have left documents water-damaged, SERVPRO uses vacuum freeze-drying and desiccant drying techniques to stabilize the paper and prevent further deterioration.
- Gentle particulate removal using HEPA vacuuming and specialized chemical sponges helps lift soot without causing additional damage.
- Ozone or hydroxyl treatments effectively eliminate smoke odors from paper materials.
- SERVPRO's digital inventory system allows for scanning, photography, video, and secure archiving of documents, ensuring critical information is preserved.
- SERVPRO transports damaged books and documents to a restoration facility equipped with controlled environments for cleaning and drying.
We are committed to restoring your documents and books to their pre-fire condition, and if you need fire damage restoration services, rest assured that our crew at SERVPRO of Hollis, Peterborough, and Weare is here for you. Contact us at (603) 256-9559. We're Faster to any size disaster™ and stand ready to help.
Why Choose SERVPRO for Water Damage Restoration?
12/13/2024 (Permalink)
Water damage can strike when you least expect it, whether it’s from a burst pipe, a severe storm, or an appliance malfunction. When your property is affected by water damage, time is critical. Acting quickly can make the difference between a minor repair and a major renovation. That’s where SERVPRO® comes in—a trusted leader in water damage restoration.
The SERVPRO Difference
At SERVPRO, we understand the stress and disruption that water damage can cause. That’s why we’re here to help 24/7, bringing fast and professional service when you need it most. Here’s what sets us apart:
1. Rapid Response
Water damage doesn’t wait, and neither do we. Our highly trained technicians are available around the clock, ensuring we arrive promptly to assess and mitigate the situation. Our swift response helps minimize damage and reduce costs.
2. Advanced Equipment
We use state-of-the-art equipment to extract water, dry affected areas, and restore your property to its pre-damage condition. From industrial-grade dehumidifiers to moisture detection tools, we have the resources needed for efficient water removal and drying.
3. Comprehensive Services
From initial water extraction to the final coat of paint, SERVPRO offers a full range of services, including:
4. Expert Technicians
Our team is IICRC-certified, meaning they have the training and expertise to handle any water damage situation. We stay up-to-date with the latest techniques and industry standards, so you can trust your property is in good hands.
5. Insurance Assistance
Dealing with insurance claims can be overwhelming. We’ll work directly with your insurance provider to streamline the process and help you navigate the paperwork, ensuring a stress-free experience.
Common Causes of Water Damage
Understanding the most common sources of water damage can help you take preventative measures. Here are some of the top culprits:
Tips for Minimizing Water Damage
While SERVPRO is here to help, there are steps you can take to mitigate damage before we arrive:
Shut off the water source immediately if possible.
Avoid entering areas with standing water for safety reasons.
Remove valuable items from the affected area to prevent further damage.
Contact SERVPRO immediately for professional assistance.
Trust SERVPRO to Make it “Like It Never Even Happened”™
When water damage disrupts your life, you need a reliable partner to restore your home or business. SERVPRO’s expertise, advanced technology, and commitment to customer satisfaction make us the top choice for water damage restoration.
Don’t let water damage take over your property—call SERVPRO today. We’re here to help you get back to normal quickly and efficiently.
When Water Damage Requires Floor Replacement: How SERVPRO Handles the Process
8/20/2024 (Permalink)
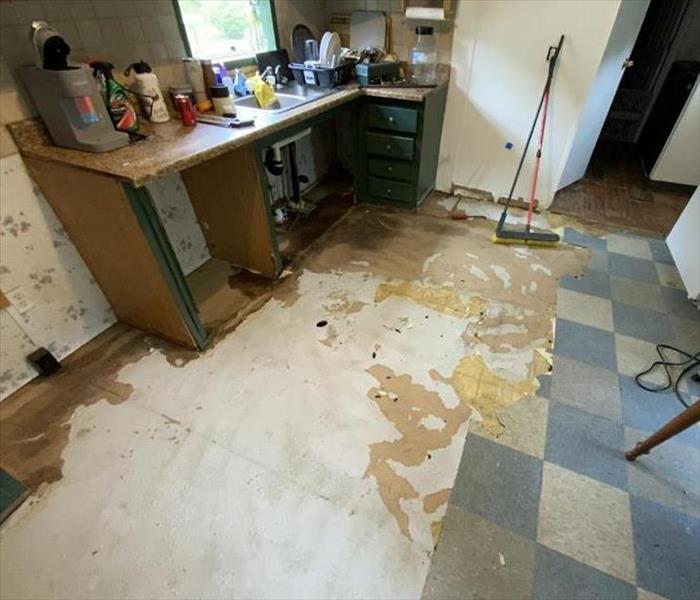 At SERVPRO®, we’re experts in managing water damage and ensuring a seamless restoration process, including when it comes to handling floor damage.
Water damage can be devastating, and sometimes the extent of the damage is so severe that it necessitates ripping up and replacing the flooring. Whether it’s due to a burst pipe, severe flooding, or a leaky roof, the process of removing and replacing damaged floors can be complex and requires a careful approach. At SERVPRO®, we’re experts in managing water damage and ensuring a seamless restoration process, including when it comes to handling floor damage.
1. Assessing the Damage
The first step in addressing water damage that affects the flooring is a thorough assessment:
- Inspection: Our team conducts a detailed inspection to determine the extent of the water damage. We assess the condition of the flooring, subfloor, and underlying structures to understand the full impact.
- Moisture Detection: Using advanced moisture meters and thermal imaging cameras, we identify any hidden moisture that may not be immediately visible but could affect the structural integrity.
2. Containing and Removing Water
Before any flooring can be removed, we need to ensure that the area is dry and safe:
- Water Extraction: We use powerful pumps and vacuums to remove standing water from the affected area. This step is crucial to prevent further damage and mold growth.
- Drying: Industrial-grade air movers and dehumidifiers are deployed to thoroughly dry the area. We monitor the drying process to ensure that all moisture is removed before proceeding.
3. Removing Damaged Flooring
Once the area is dry, we carefully remove the damaged flooring:
- Flooring Removal: Our team removes the affected flooring materials, which could include carpet, hardwood, laminate, or tile. We do this with precision to avoid causing additional damage to the subfloor.
- Subfloor Inspection: After removing the flooring, we inspect the subfloor for any signs of water damage or rot. It’s important to address any issues with the subfloor to ensure a solid foundation for the new flooring.
4. Addressing Underlying Issues
Before installing new flooring, it’s essential to address any underlying issues:
- Repairs: If the subfloor or underlying structures have been damaged, we perform the necessary repairs. This might involve replacing rotted wood or addressing structural concerns.
- Mold Remediation: If there’s any sign of mold, we handle mold remediation to ensure that your home is safe and healthy. This involves removing mold, treating affected areas, and preventing future growth.
5. Installing New Flooring
With the area prepared, we move on to installing new flooring:
- Choosing Materials: We work with you to choose the best flooring materials for your needs and preferences. Whether you’re replacing carpet with hardwood or opting for new tile, we ensure that the materials are suitable for the space.
- Professional Installation: Our experienced team handles the installation of the new flooring with care. We ensure that the installation is done correctly and meets industry standards for durability and appearance.
6. Final Touches and Inspection
Once the new flooring is installed, we perform a final inspection:
- Quality Check: We review the work to ensure that everything meets our high standards and that the new flooring is installed correctly.
- Cleanup: We handle any cleanup related to the restoration process, leaving your home in pristine condition.
7. Preventing Future Damage
To help prevent future water damage, we offer advice and solutions:
- Leak Detection: We provide recommendations for maintaining plumbing systems and detecting leaks early.
- Waterproofing: For areas prone to water damage, we can suggest waterproofing solutions to protect your home.
Conclusion
Dealing with water damage that results in ripping up and replacing the flooring requires a meticulous approach to ensure that the restoration is thorough and effective. At SERVPRO, we handle every step of the process with expertise, from initial assessment to the final installation of new flooring. Our goal is to restore your home to its pre-damage condition, ensuring that it is safe, functional, and beautiful. If you’re facing water damage issues that impact your flooring, contact SERVPRO today to get expert help and peace of mind throughout the restoration process.
Breathe Easy: Why Choosing SERVPRO for Mold Remediation is a Homeowner's Best Decision
7/15/2024 (Permalink)
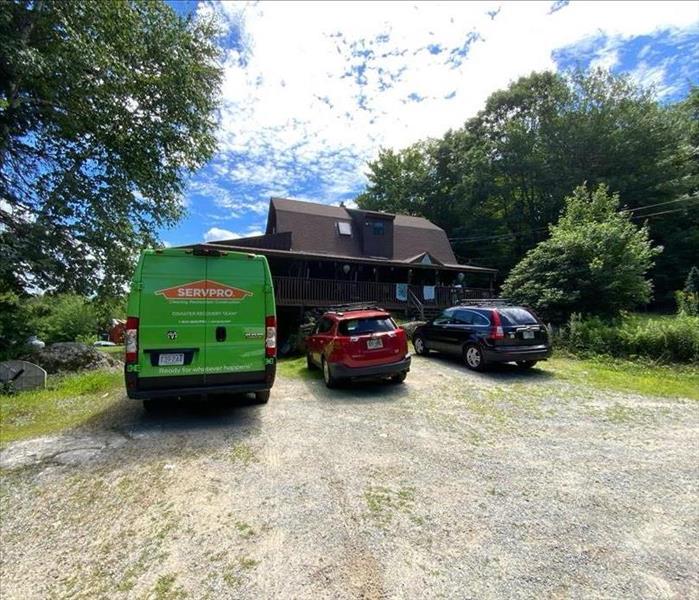 Mold thrives in moist environments, making effective moisture management a key component of successful remediation.
Mold – the unwelcome intruder that can turn any homeowner's dream space into a nightmare. Whether it's lurking in damp basements, hiding behind walls, or thriving in humid bathrooms, mold doesn't discriminate. But fear not! SERVPRO® is here to rescue your home and restore your peace of mind. Here’s why entrusting SERVPRO with mold remediation is the smartest move you can make as a homeowner.
Expertise and Experience
Mold remediation isn't just about scrubbing walls – it requires specialized knowledge and precise techniques to ensure thorough removal and prevention of recurrence. SERVPRO technicians are certified in mold remediation, equipped with advanced tools and techniques to handle even the most stubborn mold infestations. Our comprehensive approach addresses not only visible mold but also hidden growth and underlying moisture issues, ensuring your home is restored to a safe and healthy environment.
Safety First, Always
When dealing with mold, safety is paramount. Certain types of mold can pose health risks, particularly to individuals with respiratory issues or compromised immune systems. SERVPRO adheres to strict safety protocols, including containment measures to prevent mold spores from spreading to unaffected areas of your home. We use specialized equipment such as HEPA air scrubbers and protective gear to ensure the safety of our technicians and your family throughout the remediation process.
Effective Moisture Management
Mold thrives in moist environments, making effective moisture management a key component of successful remediation. SERVPRO not only removes existing mold but also identifies and addresses the source of moisture that allowed mold to grow in the first place. Whether it's repairing leaky pipes, improving ventilation, or addressing humidity levels, we take a proactive approach to prevent future mold problems and protect your home from costly damage.
Comprehensive Restoration Services
Beyond mold remediation, SERVPRO offers a range of restoration services to ensure your home is fully restored to its pre-mold condition. This includes repairing or replacing damaged materials, cleaning and sanitizing affected areas, and restoring air quality through professional air duct cleaning. Our goal is not just to eliminate mold but also to restore your home to a safe, comfortable, and livable space for you and your family.
Insurance Assistance and Peace of Mind
Navigating insurance claims can be overwhelming, especially during a mold remediation project. SERVPRO works closely with insurance providers to streamline the claims process and maximize coverage for our customers. Our experienced team provides detailed documentation and transparent pricing, ensuring clarity and peace of mind throughout the restoration journey.
Customer Satisfaction Guaranteed
At SERVPRO, we understand that dealing with mold can be stressful. That's why we prioritize clear communication, responsive service, and meticulous attention to detail. From the initial assessment to the final inspection, we keep you informed and involved every step of the way. Our goal is not just to meet but to exceed your expectations, leaving you with a home that is clean, safe, and mold-free.
Conclusion: Choose SERVPRO for Peace of Mind
In conclusion, when it comes to mold remediation, choosing SERVPRO is the best decision you can make as a homeowner. With our expertise, commitment to safety, effective moisture management, comprehensive restoration services, insurance assistance, and dedication to customer satisfaction, we ensure that your home is restored to a healthy environment where you can breathe easy. Don't let mold take control – contact SERVPRO today and let us restore your home and your peace of mind.
Essential Mold Prevention Checklist for Home and Business Owners
7/9/2024 (Permalink)
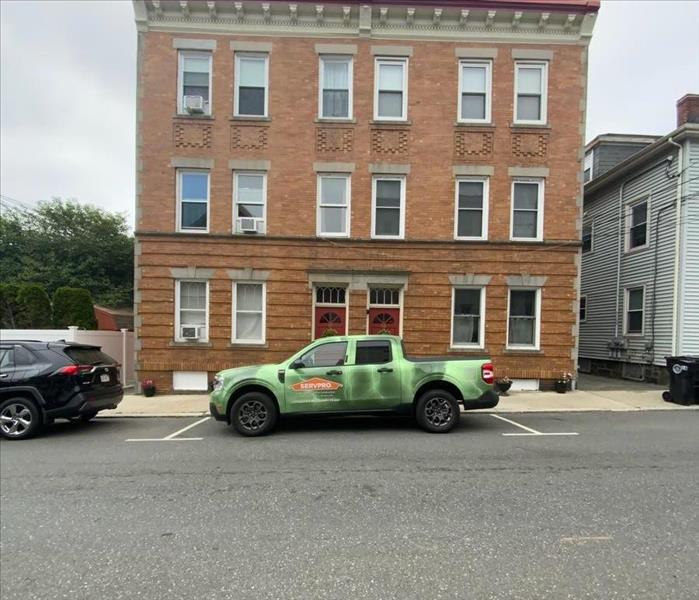 Contact SERVPRO today to schedule a mold inspection or learn more about our mold remediation services
As temperatures rise during the summer months, the risk of mold growth increases. Mold not only damages property but also poses health risks. At SERVPRO®, we understand the importance of proactive mold prevention. Follow our comprehensive checklist to keep your home or business mold-free this season.
Mold Prevention Checklist:
Inspect and Seal Leaks: Regularly inspect plumbing, roofs, and windows for leaks. Seal any identified leaks promptly to prevent moisture buildup.
Monitor Humidity Levels: Use a hygrometer to monitor indoor humidity levels. Keep humidity below 60% to inhibit mold growth.
Improve Ventilation: Ensure adequate ventilation in bathrooms, kitchens, and other humid areas. Use exhaust fans and open windows when cooking or showering.
Clean and Maintain Gutters: Clean gutters and downspouts regularly to prevent water from accumulating near the foundation and seeping into the building.
Direct Water Away from Foundation: Ensure landscaping and drainage systems direct water away from the building's foundation to prevent moisture penetration.
Inspect HVAC Systems: Regularly inspect HVAC systems, including air ducts and filters. Clean or replace filters as recommended and check for mold growth in ducts.
Monitor Basement and Crawl Spaces: Keep basements and crawl spaces dry and well-ventilated. Use a dehumidifier if necessary and ensure there are no leaks or standing water.
Inspect Roof and Exterior: Check the roof and exterior walls for any signs of damage or wear that could allow moisture to enter the building.
Use Mold-Resistant Products: Consider using mold-resistant paints and building materials, especially in moisture-prone areas like bathrooms and basements.
Regular Inspections: Conduct regular inspections of the property for signs of mold, such as musty odors, discolored walls or ceilings, or visible mold growth.
Taking proactive steps to prevent mold growth is key to maintaining a healthy and safe environment in your home or business. By following this checklist, you can significantly reduce the risk of mold and the potential damage it can cause. Should you discover mold or suspect its presence despite preventive measures, don’t hesitate to contact SERVPRO for professional mold remediation services.
Contact SERVPRO today to schedule a mold inspection or learn more about our mold remediation services. Our trained professionals are here to help keep your property mold-free and your environment healthy.
Cleaning Out Old Chicken from Your Freezer: Tips from SERVPRO
6/24/2024 (Permalink)
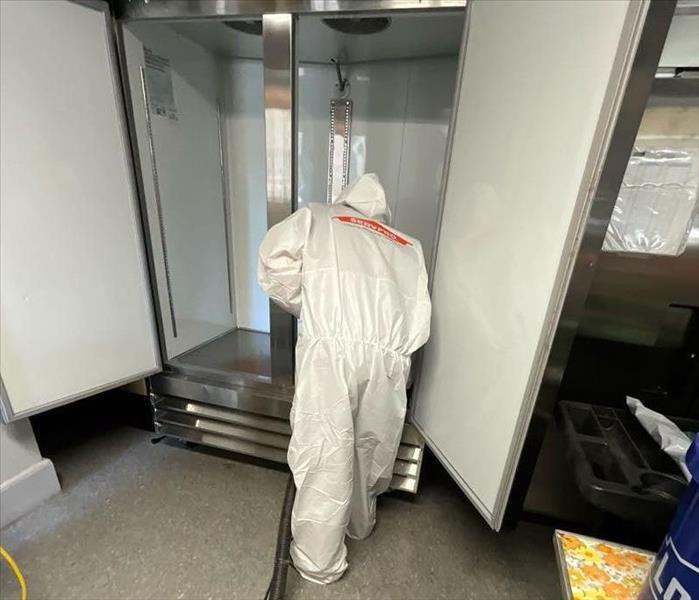 For professional cleaning and odor removal services, trust SERVPRO.
Cleaning Out Old Chicken from Your Freezer: Tips from SERVPRO®
Discovering old chicken in your freezer can be a smelly surprise, but cleaning it out properly is crucial to avoid lingering odors and potential health risks. Here’s a step-by-step guide on how to effectively clean out your freezer after finding old chicken:
1. Safety First: Before starting, ensure your safety by wearing gloves and possibly a mask if the smell is strong. This protects you from potential bacteria and prevents the spread of odors.
2. Unplug the Freezer: Turn off and unplug the freezer to avoid any accidents while cleaning. This also prevents the freezer from continuing to operate with the door open, which could cause it to overheat.
3. Remove the Chicken: Carefully remove the old chicken and any other affected items from the freezer. Place them in a garbage bag and dispose of them properly to prevent further contamination or odor spread.
4. Empty and Defrost the Freezer: Remove all shelves, drawers, and trays from the freezer. Allow it to fully defrost if ice has built up. Use towels to soak up any water that accumulates during the defrosting process.
5. Clean with a Mild Cleaner: Prepare a solution of warm water and a mild detergent or antibacterial cleaner. Use a sponge or cloth to thoroughly clean all interior surfaces of the freezer, including shelves, walls, and door seals. Pay extra attention to areas where chicken or juices may have spilled.
6. Rinse and Dry: After cleaning, rinse the interior of the freezer with clean water to remove any remaining cleaner residue. Dry all surfaces thoroughly with a clean towel or allow them to air dry completely.
7. Deodorize if Necessary: If there are lingering odors, you can deodorize the freezer by placing baking soda or activated charcoal inside and leaving it for several hours or overnight. Alternatively, use a commercial freezer deodorizer.
8. Reassemble and Restock: Once the freezer is clean, dry, and odor-free, reassemble shelves and trays. Plug the freezer back in and allow it to cool to the desired temperature before restocking with fresh, properly packaged items.
9. Regular Maintenance: To prevent future odor problems, regularly clean and organize your freezer. Check for expired items and promptly dispose of them to maintain freshness and cleanliness.
Conclusion:
Cleaning out old chicken from your freezer is a necessary task to ensure food safety and maintain a pleasant kitchen environment. By following these steps and taking the time to clean thoroughly, you can restore your freezer to a clean and sanitary condition. For more extensive cleaning or odor removal needs, consider contacting SERVPRO® for professional assistance and peace of mind.
For professional cleaning and odor removal services, trust SERVPRO. Contact us today to learn more about our comprehensive cleaning solutions and how we can help restore your home to its cleanest state.
Dealing with a Stove Fire: Steps to Take and How SERVPRO Cleans Fire Extinguisher Debris
6/24/2024 (Permalink)
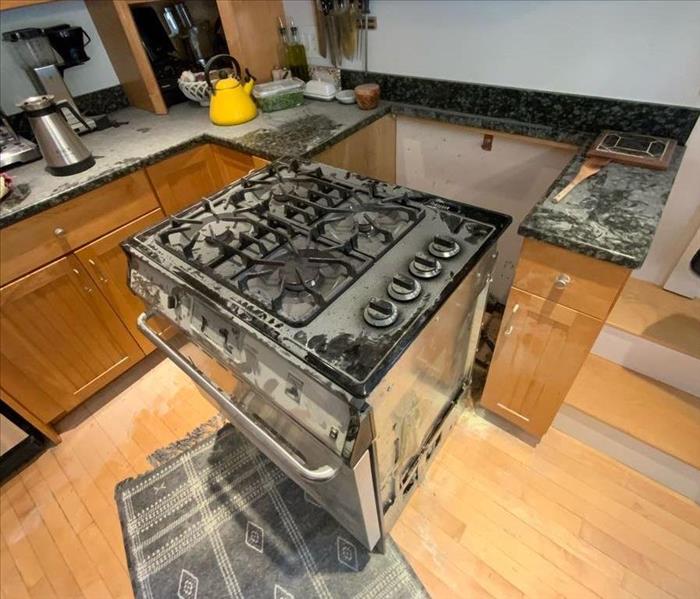 SERVPRO handles fire extinguisher debris cleanup.
A stove fire can quickly escalate from a cooking mishap to a potentially dangerous situation. Knowing how to react promptly and effectively can make a significant difference in minimizing damage and ensuring safety. Here’s what to do if you experience a stove fire, along with insights into how SERVPRO® handles fire extinguisher debris cleanup:
1. Safety First:
- Assess the Situation: If the fire is small and manageable, attempt to smother it by carefully sliding a lid over the pan and turning off the burner. Never use water on a grease fire as it can cause the flames to spread.
- Evacuate if Necessary: If the fire is large, spreading, or you cannot safely extinguish it, evacuate everyone from the home immediately and call emergency services.
2. Post-Fire Steps:
- Ventilate the Area: Open windows and doors to ventilate smoke and fumes from the kitchen.
- Assess Damage: Inspect for smoke and soot damage to surrounding surfaces and items.
3. Contact SERVPRO:
- Professional Assessment: After ensuring everyone’s safety, contact SERVPRO for a professional assessment and cleanup. Our experts are trained to handle fire damage, including residue cleanup and odor removal.
4. Fire Extinguisher Debris Cleanup:
- Handling Residue: SERVPRO uses specialized equipment and techniques to clean up fire extinguisher residue, which can be corrosive and damaging if not properly cleaned.
- Thorough Cleaning: We clean affected surfaces, including walls, floors, and furniture, to remove all traces of residue and ensure your home is safe and clean.
5. Odor Removal:
- Neutralizing Odors: Smoke and fire extinguisher residue can leave lingering odors. SERVPRO employs industrial-grade deodorization techniques to neutralize odors and restore indoor air quality.
6. Restoration Services:
- Repairs and Restoration: Depending on the extent of damage, SERVPRO provides comprehensive restoration services to repair and restore your kitchen and home to pre-fire condition.
Conclusion: Experiencing a stove fire can be distressing, but with prompt action and professional assistance from SERVPRO, you can mitigate damage and ensure a thorough cleanup. From handling fire extinguisher debris to restoring your home, our team is here to help every step of the way.
For expert fire damage cleanup and restoration services, contact SERVPRO. Trust our expertise to restore your home quickly and efficiently.
When fire strikes, trust SERVPRO for fast and reliable cleanup and restoration services. Contact us today for immediate assistance and peace of mind.
Monitoring Dry-Out Progress: Key Metrics for Effective Water Damage Restoration
6/11/2024 (Permalink)
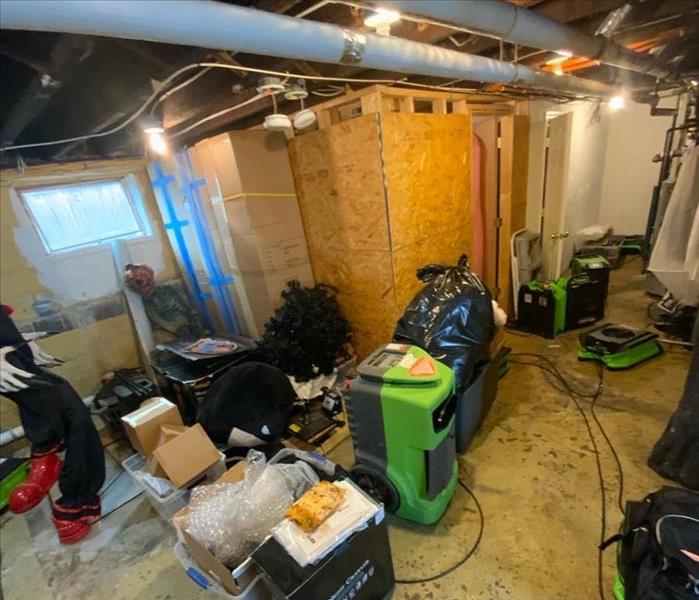 Effective monitoring of the dry-out process is essential for successful water damage restoration.
In the aftermath of water damage, monitoring the dry-out process is crucial for successful restoration. At SERVPRO®, we employ a range of metrics to assess progress and ensure thorough drying after the initial response. Here's a closer look at the key metrics we use:
1. Moisture Levels:
Moisture Meters: Our technicians use moisture meters to measure the moisture content of affected materials, such as walls, floors, and ceilings. By tracking moisture levels over time, we can determine if drying goals are being met and adjust our strategies accordingly.
Infrared Cameras: Infrared cameras help us identify hidden pockets of moisture that may not be visible to the naked eye. This allows for targeted drying efforts to ensure complete moisture removal.
2. Humidity Levels:
- Hygrometers: Hygrometers measure relative humidity levels in the air. We aim to maintain optimal humidity levels during the drying process to facilitate evaporation and prevent secondary damage, such as mold growth.
3. Temperature:
- Thermometers: Monitoring temperature is essential for promoting efficient drying. Warmer temperatures accelerate the drying process by increasing the rate of evaporation.
4. Drying Progress Documentation:
- Daily Logs: We maintain detailed logs documenting the progress of the drying process. These logs include measurements of moisture levels, humidity, and temperature, as well as observations on the condition of affected materials.
5. Psychrometry:
- Psychrometric Calculations: Using psychrometric calculations, we analyze the relationship between temperature, humidity, and moisture content to optimize drying conditions and achieve faster results.
6. Visual Inspection:
- Visual Assessment: Regular visual inspections allow us to assess the condition of materials and identify any signs of residual moisture or potential issues that may require additional attention.
7. Customer Feedback:
- Communication: We prioritize open communication with our customers throughout the drying process. Customer feedback and observations are valuable indicators of progress and help us tailor our approach to meet their specific needs and expectations.
Conclusion:
Effective monitoring of the dry-out process is essential for successful water damage restoration. By utilizing a combination of metrics, including moisture levels, humidity, temperature, and visual inspections, along with ongoing communication with customers, SERVPRO ensures thorough drying and optimal restoration outcomes. Trust SERVPRO for comprehensive water damage restoration services backed by advanced technology and expertise.
Navigating the Aftermath of a Commercial Large Loss: Understanding Mold Hazards with SERVPRO
6/3/2024 (Permalink)
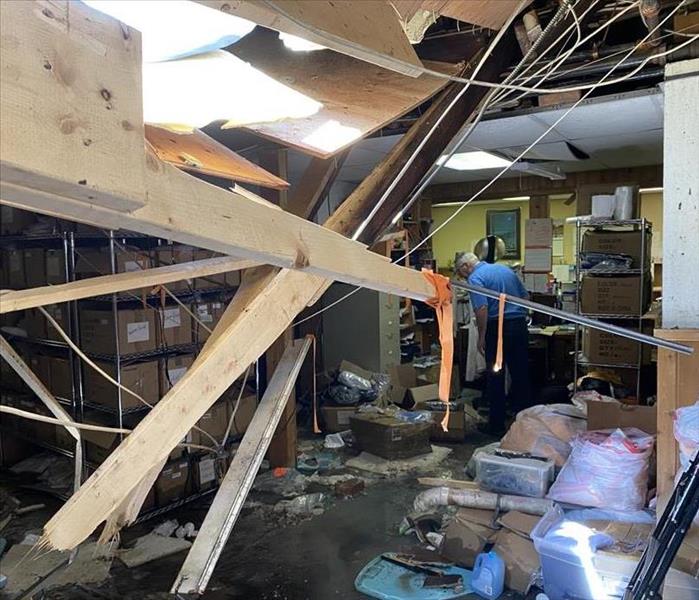 Trust SERVPRO to provide expert mold remediation services and comprehensive restoration solutions tailored to your unique needs.
Dealing with the aftermath of a large loss at a commercial property can be overwhelming, especially when mold becomes a concern. Let's explore the challenges of mold hazards following a commercial large loss and how SERVPRO® can help mitigate the risks and restore your property to its preloss condition.
The Impact of a Commercial Large Loss
When a commercial property experiences a large loss—whether due to fire, water damage, or natural disasters—the repercussions can be significant. Beyond the immediate damage to the property and contents, there's often a hidden threat lurking in the aftermath: mold.
Understanding Mold Hazards
Mold thrives in damp, humid environments, making it a common concern following water damage incidents. In the wake of a commercial large loss, moisture may linger in building materials, creating ideal conditions for mold growth. Left unchecked, mold can spread rapidly, causing structural damage, compromising indoor air quality, and posing health risks to occupants.
SERVPRO's Approach to Mold Remediation
Thorough Inspection: SERVPRO conducts a comprehensive inspection of the affected area to identify areas of mold growth and assess the extent of the damage.
Containment: To prevent cross-contamination, SERVPRO employs containment measures to isolate the affected areas and prevent mold spores from spreading to unaffected areas.
Safe Mold Removal: Our certified technicians utilize industry-leading techniques and equipment to safely remove mold colonies and contaminated materials, ensuring thorough remediation and preventing recurrence.
Drying and Dehumidification: Addressing moisture is key to preventing mold growth. SERVPRO employs advanced drying and dehumidification methods to eliminate excess moisture and restore optimal humidity levels.
Cleaning and Sanitization: SERVPRO conducts thorough cleaning and sanitization of affected surfaces to remove mold spores and inhibit future growth, restoring indoor air quality and ensuring a safe environment for occupants.
Partnering with SERVPRO for Mold Remediation
When facing mold hazards following a commercial large loss, partnering with SERVPRO offers peace of mind and confidence in the restoration process. With our expertise, advanced technology, and commitment to excellence, we'll work tirelessly to mitigate mold risks and restore your property to its preloss condition, minimizing downtime and ensuring a safe and healthy environment for all.
Conclusion
Don't let mold hazards exacerbate the challenges of a commercial large loss. Trust SERVPRO to provide expert mold remediation services and comprehensive restoration solutions tailored to your unique needs. Contact us today to learn more about how we can help you navigate the aftermath of a commercial large loss and restore your property to its former glory. We're Here to Help®.
 SERVPRO technicians expertly remove water to mitigate damage in Wilton area properties. "Like it never even happened."

 24/7 Emergency Service


